
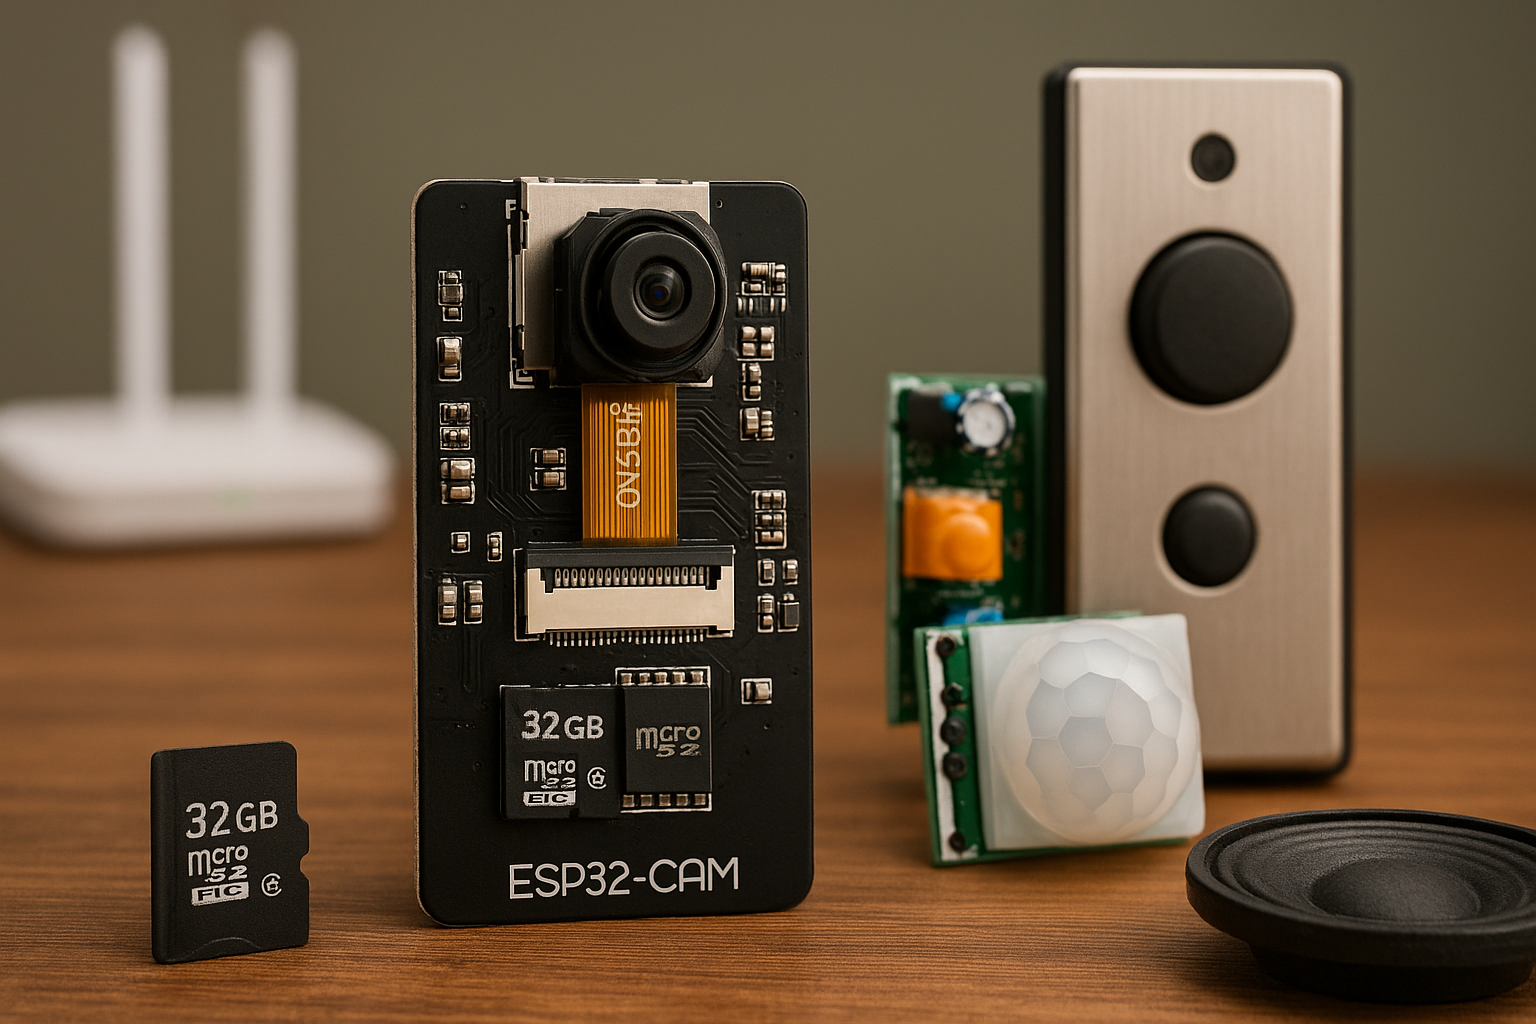
This ESP32-CAM Wi-Fi doorbell camera is used as a smart, wireless video doorbell or motion-activated security camera for homes, offices, or remote properties, Low-cost alternative to commercial video doorbells, Battery-friendly with deep sleep mode for long-lasting use, Offline image storage on SD card – no internet required, Wi-Fi-enabled for optional remote access and upgrades, Customizable & expandable (add audio, cloud upload, etc.)
🔧 Key Features
- 📷 ESP32-CAM Video Capture
Captures JPEG images upon trigger and saves to SD card. - 🚪 PIR Motion Sensor & Doorbell Button
Wakes the ESP32-CAM from deep sleep when:- Motion is detected (PIR sensor)
- The doorbell button is pressed
- 💾 SD Card Recording
Stores images locally on a microSD card for offline viewing. - 🔋 Battery-Optimized with Deep Sleep
Uses deep sleep mode to significantly reduce power consumption, ideal for battery-powered operation. - 🌐 Optional Wi-Fi Support
Connects to Wi-Fi to enable future features like cloud upload, notifications, or live streaming. - 🔊 Expandable with Audio
Can be extended with a microphone or speaker for recording audio or playing chimes/alerts. - 💡 Flash LED Support
Optional LED flash for night-time image capture.
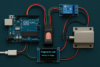
📦 Hardware Required:
- ESP32-CAM module
- FTDI Programmer (3.3V)
- Push button (optional for doorbell trigger)
- 5V Power Supply (with 1A current)
- microSD Card (Class 10 recommended)
🔧 Setup & Libraries:
Install the board:
- In Arduino IDE, go to Preferences.
- Add this URL to
Additional Board URLs:
https://raw.githubusercontent.com/espressif/arduino-esp32/gh-pages/package_esp32_index.json
- Go to Boards Manager and install esp32.
Select the Board:
- Board: AI Thinker ESP32-CAM
- Upload Speed: 115200
- Partition Scheme: Huge App (3MB No OTA)
1️⃣ Face Detection & Recognition + Streaming
ESP32-CAM comes with built-in face detection & recognition in the CameraWebServer example.
✅ Go to:
File → Examples → ESP32 → Camera → CameraWebServer
In camera_pins.h, make sure you’re using the correct pinout for AI Thinker:
#define PWDN_GPIO_NUM     -1
#define RESET_GPIO_NUM    -1
#define XCLK_GPIO_NUM      0
#define SIOD_GPIO_NUM     26
#define SIOC_GPIO_NUM     27

#define Y9_GPIO_NUM       35
#define Y8_GPIO_NUM       34
#define Y7_GPIO_NUM       39
#define Y6_GPIO_NUM       36
#define Y5_GPIO_NUM       21
#define Y4_GPIO_NUM       19
#define Y3_GPIO_NUM       18
#define Y2_GPIO_NUM        5
#define VSYNC_GPIO_NUM    25
#define HREF_GPIO_NUM     23
#define PCLK_GPIO_NUM     22
Update Wi-Fi credentials:
const char* ssid = "YOUR_SSID";
const char* password = "YOUR_PASSWORD";
Upload, open serial monitor, and note the IP address. Access this IP in a browser to stream, detect faces, and enroll/recognize faces.
2️⃣ Recording to TF Card (Video Frames or JPEG)
Due to ESP32 limitations, it can’t store actual video files (like MP4), but it can:
- Capture still JPEGs
- Save a series of images to the SD card (timestamped)
Example snippet to save JPEGs:
#include "esp_camera.h"
#include "FS.h"
#include "SD_MMC.h"

void saveImageToSD() {
  camera_fb_t * fb = NULL;
  fb = esp_camera_fb_get();
  if (!fb) {
    Serial.println("Camera capture failed");
    return;
  }

  String path = "/photo" + String(millis()) + ".jpg";
  fs::FS &fs = SD_MMC;
  File file = fs.open(path.c_str(), FILE_WRITE);
  if (!file) {
    Serial.println("Failed to open file in writing mode");
  } else {
    file.write(fb->buf, fb->len);
    Serial.println("Saved file: " + path);
  }
  file.close();
  esp_camera_fb_return(fb);
}
Initialize SD card:
if(!SD_MMC.begin()){
  Serial.println("Card Mount Failed");
  return;
}
3️⃣ Add Doorbell Trigger (Pushbutton)
#define BUTTON_PIN 12 // or any unused GPIO

void setup() {
  pinMode(BUTTON_PIN, INPUT_PULLUP);
}

void loop() {
  if (digitalRead(BUTTON_PIN) == LOW) {
    saveImageToSD();
    // Optional: send notification or trigger face recognition
  }
}
🧠 Face Recognition Flow:
- Access ESP32 IP in browser
- Enable Face Detection
- Press Enroll Face to register
- ESP32 will recognize enrolled faces live
⚠️ Limitations:
- Limited RAM = no real video recording (only JPEG series)
- Recording to SD in burst mode can drop frames
- Recognition quality is limited by lighting and distance
✅ Summary:
| Feature | Supported | Method |
|---|---|---|
| Live video streaming | ✅ | Web interface via browser |
| Face detection | ✅ | Built-in ESP32-CAM feature |
| Face recognition | ✅ | Requires enrollment via browser interface |
| Save to SD card | ✅ | Save JPEG frames to /photoXXXX.jpg |
| Doorbell trigger | ✅ | Physical button or motion sensor |
| Remote alerts (opt) | ✅ | Telegram bot or HTTP webhook |
📶 Video streaming via browser
😊 Face detection/recognition via web interface
🔘 Pushbutton trigger to save photo to SD card
💾 Save captured images to microSD
✅ Fully compatible with Arduino IDE
📄 Arduino Sketch
#include "esp_camera.h"
#include "FS.h"
#include "SD_MMC.h"
#include "soc/soc.h"
#include "soc/rtc_cntl_reg.h"
#include "driver/rtc_io.h"
#include <WiFi.h>

// 🔧 Replace with your Wi-Fi credentials
const char* ssid = "YOUR_WIFI_SSID";
const char* password = "YOUR_WIFI_PASSWORD";

// 🔘 Doorbell button pin
#define DOORBELL_PIN 12

// ⚙️ Camera model: AI Thinker
#define PWDN_GPIO_NUM     -1
#define RESET_GPIO_NUM    -1
#define XCLK_GPIO_NUM      0
#define SIOD_GPIO_NUM     26
#define SIOC_GPIO_NUM     27

#define Y9_GPIO_NUM       35
#define Y8_GPIO_NUM       34
#define Y7_GPIO_NUM       39
#define Y6_GPIO_NUM       36
#define Y5_GPIO_NUM       21
#define Y4_GPIO_NUM       19
#define Y3_GPIO_NUM       18
#define Y2_GPIO_NUM        5
#define VSYNC_GPIO_NUM    25
#define HREF_GPIO_NUM     23
#define PCLK_GPIO_NUM     22

void startCameraServer();  // forward declaration

void saveImageToSD() {
  camera_fb_t * fb = esp_camera_fb_get();
  if (!fb) {
    Serial.println("Camera capture failed");
    return;
  }

  // Generate unique file name with timestamp
  String path = "/photo_" + String(millis()) + ".jpg";
  fs::FS &fs = SD_MMC;
  File file = fs.open(path.c_str(), FILE_WRITE);
  if (!file) {
    Serial.println("Failed to open file in writing mode");
  } else {
    file.write(fb->buf, fb->len);
    Serial.printf("Saved file: %s (%zu bytes)\n", path.c_str(), fb->len);
  }
  file.close();
  esp_camera_fb_return(fb);
}

void setup() {
  WRITE_PERI_REG(RTC_CNTL_BROWN_OUT_REG, 0); // Disable brownout detector

  Serial.begin(115200);
  pinMode(DOORBELL_PIN, INPUT_PULLUP);

  // 📷 Camera Configuration
  camera_config_t config;
  config.ledc_channel = LEDC_CHANNEL_0;
  config.ledc_timer   = LEDC_TIMER_0;
  config.pin_d0       = Y2_GPIO_NUM;
  config.pin_d1       = Y3_GPIO_NUM;
  config.pin_d2       = Y4_GPIO_NUM;
  config.pin_d3       = Y5_GPIO_NUM;
  config.pin_d4       = Y6_GPIO_NUM;
  config.pin_d5       = Y7_GPIO_NUM;
  config.pin_d6       = Y8_GPIO_NUM;
  config.pin_d7       = Y9_GPIO_NUM;
  config.pin_xclk     = XCLK_GPIO_NUM;
  config.pin_pclk     = PCLK_GPIO_NUM;
  config.pin_vsync    = VSYNC_GPIO_NUM;
  config.pin_href     = HREF_GPIO_NUM;
  config.pin_sscb_sda = SIOD_GPIO_NUM;
  config.pin_sscb_scl = SIOC_GPIO_NUM;
  config.pin_pwdn     = PWDN_GPIO_NUM;
  config.pin_reset    = RESET_GPIO_NUM;
  config.xclk_freq_hz = 20000000;
  config.pixel_format = PIXFORMAT_JPEG;

  // init with high specs to support face detection/recognition
  if (psramFound()) {
    config.frame_size = FRAMESIZE_QVGA;
    config.jpeg_quality = 10;
    config.fb_count = 2;
  } else {
    config.frame_size = FRAMESIZE_QQVGA;
    config.jpeg_quality = 12;
    config.fb_count = 1;
  }

  // Init Camera
  esp_err_t err = esp_camera_init(&config);
  if (err != ESP_OK) {
    Serial.printf("Camera init failed with error 0x%x", err);
    return;
  }

  // Init microSD card
  if (!SD_MMC.begin()) {
    Serial.println("SD Card Mount Failed");
    return;
  } else {
    uint8_t cardType = SD_MMC.cardType();
    if (cardType == CARD_NONE) {
      Serial.println("No SD card attached");
      return;
    }
    Serial.println("SD card initialized.");
  }

  // Connect to Wi-Fi
  WiFi.begin(ssid, password);
  Serial.print("Connecting to WiFi");
  while (WiFi.status() != WL_CONNECTED) {
    delay(500);
    Serial.print(".");
  }
  Serial.println();
  Serial.println("WiFi connected");
  Serial.print("Camera Stream Ready! Go to: http://");
  Serial.println(WiFi.localIP());

  // Start camera web server
  startCameraServer();
}

void loop() {
  // Doorbell button press
  if (digitalRead(DOORBELL_PIN) == LOW) {
    Serial.println("🔔 Doorbell pressed! Saving photo...");
    saveImageToSD();
    delay(2000);  // debounce and cooldown
  }
}
🌐 Web Streaming with Face Detection
We’ll reuse the built-in web interface from the ESP32-CAM:
Add this function below your loop():
#include "camera_index.h"
#include "esp_http_server.h"

void startCameraServer() {
  httpd_config_t config = HTTPD_DEFAULT_CONFIG();

  httpd_uri_t index_uri = {
    .uri       = "/",
    .method    = HTTP_GET,
    .handler   = [](httpd_req_t *req) {
      extern const uint8_t index_html_start[] asm("_binary_index_html_start");
      extern const uint8_t index_html_end[]   asm("_binary_index_html_end");
      size_t index_html_len = index_html_end - index_html_start;
      httpd_resp_send(req, (const char *)index_html_start, index_html_len);
      return ESP_OK;
    },
    .user_ctx  = NULL
  };

  if (httpd_start(&config.server, &config) == ESP_OK) {
    httpd_register_uri_handler(config.server, &index_uri);
  }

  // Load camera streaming endpoints
  startCameraServer();  // from ESP32 examples
}
Or, just copy startCameraServer() from the CameraWebServer example in Arduino IDE.
✅ Result:
- Access
http://<ESP32_IP>in your browser. - Live streaming + face detection UI.
- Press doorbell button → photo saved to SD card as
/photo_*.jpg.
🎥 Live Video Streaming — How it Works:
The function startCameraServer() (from the official CameraWebServer example) creates an embedded web page that shows:
- 📷 Live MJPEG video stream
- 😊 Face detection & recognition
- 📸 Manual capture button
📲 To View the Live Stream:
- Upload the sketch.
- Open Serial Monitor and get the IP address (e.g.
192.168.1.123). - Open a browser and go to:
http://192.168.1.123
You’ll see a full web interface with live video and options like:
- Start Stream
- Face Detection / Recognition
- Set Resolution / Quality
- Capture
⚠️ If You Don’t See Live Video
Make sure:
- You’re connected to the same Wi-Fi as the ESP32-CAM.
- Power supply is stable (some USB ports don’t supply enough current).
- Browser supports MJPEG (works well in Chrome and Firefox).
✅ Bonus: The Web Interface
This web interface is baked into the ESP32 Arduino core and uses these endpoints:
| Endpoint | Description |
|---|---|
/ | Loads the main HTML UI |
/stream | MJPEG live stream |
/capture | Capture still image |
/status, /control | Handle settings like brightness, etc. |
🧪 Want to Test the Stream Without the Web UI?
Try opening:
http://<your-esp32-ip>:81/stream
This directly shows the raw MJPEG stream.
🧪 What This Does:
| Feature | Included? | Description |
|---|---|---|
| 📶 Wi-Fi setup | ✅ | Connects to your network and prints IP |
| 🎥 Live MJPEG stream | ✅ | Visit http://<esp32-ip> to view live stream |
| 🔘 Button capture | ✅ | Captures photo on button press |
| 💾 Save to microSD | ✅ | Saves .jpg images like photo_123456.jpg |
| 😊 Face detection UI | ❌ | Not in this minimal version (can be added) |
⚠️ Notes:
- Replace
YOUR_WIFI_SSIDandYOUR_WIFI_PASSWORDwith your actual credentials. - Use a Class 10 microSD card formatted as FAT32.
- Ensure stable 5V/1A power to avoid crashes.
✅ Features Added:
- 😊 Face detection & recognition UI via web interface
- 🚶 PIR sensor trigger for automatic photo capture when motion is detected
🛠️ Hardware Connections:
| Component | Pin |
|---|---|
| PIR Sensor OUT | GPIO 13 |
| Doorbell Button | GPIO 12 |
| MicroSD Card | Built-in (SD_MMC) |
✅ Complete Arduino Sketch:
#include "esp_camera.h"
#include "FS.h"
#include "SD_MMC.h"
#include <WiFi.h>
#include "esp_timer.h"
#include "img_converters.h"
#include "Arduino.h"
#include "fb_gfx.h"
#include "esp_http_server.h"
#include "soc/soc.h"
#include "soc/rtc_cntl_reg.h"
#include "driver/rtc_io.h"
#include "fd_forward.h"
#include "fr_forward.h"

// WiFi credentials
const char* ssid = "YOUR_WIFI_SSID";
const char* password = "YOUR_WIFI_PASSWORD";

// Pins
#define PIR_PIN 13
#define DOORBELL_BUTTON_PIN 12

// Camera module: AI Thinker
#define PWDN_GPIO_NUM     -1
#define RESET_GPIO_NUM    -1
#define XCLK_GPIO_NUM      0
#define SIOD_GPIO_NUM     26
#define SIOC_GPIO_NUM     27
#define Y9_GPIO_NUM       35
#define Y8_GPIO_NUM       34
#define Y7_GPIO_NUM       39
#define Y6_GPIO_NUM       36
#define Y5_GPIO_NUM       21
#define Y4_GPIO_NUM       19
#define Y3_GPIO_NUM       18
#define Y2_GPIO_NUM        5
#define VSYNC_GPIO_NUM    25
#define HREF_GPIO_NUM     23
#define PCLK_GPIO_NUM     22

// Forward declarations
void startCameraServer();
void savePhotoToSD();
void setupFaceRecognition();

bool motionDetected = false;

void IRAM_ATTR onPirTrigger() {
  motionDetected = true;
}

void setup() {
  WRITE_PERI_REG(RTC_CNTL_BROWN_OUT_REG, 0); // Disable brownout detector
  Serial.begin(115200);
  Serial.setDebugOutput(false);

  pinMode(DOORBELL_BUTTON_PIN, INPUT_PULLUP);
  pinMode(PIR_PIN, INPUT_PULLUP);
  attachInterrupt(digitalPinToInterrupt(PIR_PIN), onPirTrigger, RISING);

  // Camera configuration
  camera_config_t config;
  config.ledc_channel = LEDC_CHANNEL_0;
  config.ledc_timer = LEDC_TIMER_0;
  config.pin_d0 = Y2_GPIO_NUM;
  config.pin_d1 = Y3_GPIO_NUM;
  config.pin_d2 = Y4_GPIO_NUM;
  config.pin_d3 = Y5_GPIO_NUM;
  config.pin_d4 = Y6_GPIO_NUM;
  config.pin_d5 = Y7_GPIO_NUM;
  config.pin_d6 = Y8_GPIO_NUM;
  config.pin_d7 = Y9_GPIO_NUM;
  config.pin_xclk = XCLK_GPIO_NUM;
  config.pin_pclk = PCLK_GPIO_NUM;
  config.pin_vsync = VSYNC_GPIO_NUM;
  config.pin_href = HREF_GPIO_NUM;
  config.pin_sscb_sda = SIOD_GPIO_NUM;
  config.pin_sscb_scl = SIOC_GPIO_NUM;
  config.pin_pwdn = PWDN_GPIO_NUM;
  config.pin_reset = RESET_GPIO_NUM;
  config.xclk_freq_hz = 20000000;
  config.pixel_format = PIXFORMAT_JPEG;

  if(psramFound()){
    config.frame_size = FRAMESIZE_VGA;
    config.jpeg_quality = 10;
    config.fb_count = 2;
  } else {
    config.frame_size = FRAMESIZE_QVGA;
    config.jpeg_quality = 12;
    config.fb_count = 1;
  }

  // Init camera
  esp_err_t err = esp_camera_init(&config);
  if (err != ESP_OK) {
    Serial.printf("Camera init failed: 0x%x", err);
    return;
  }

  // SD card
  if (!SD_MMC.begin()) {
    Serial.println("SD Card Mount Failed");
    return;
  }
  Serial.println("SD card initialized.");

  // Wi-Fi
  WiFi.begin(ssid, password);
  Serial.print("Connecting to Wi-Fi");
  while (WiFi.status() != WL_CONNECTED) {
    delay(500); Serial.print(".");
  }
  Serial.println("\nWi-Fi connected");
  Serial.print("Stream ready: http://");
  Serial.println(WiFi.localIP());

  setupFaceRecognition();
  startCameraServer();
}

void loop() {
  if (digitalRead(DOORBELL_BUTTON_PIN) == LOW) {
    Serial.println("Doorbell pressed. Capturing...");
    savePhotoToSD();
    delay(2000);
  }

  if (motionDetected) {
    motionDetected = false;
    Serial.println("Motion detected by PIR! Capturing...");
    savePhotoToSD();
    delay(2000);
  }
}

void savePhotoToSD() {
  camera_fb_t * fb = esp_camera_fb_get();
  if (!fb) {
    Serial.println("Camera capture failed");
    return;
  }

  String path = "/img_" + String(millis()) + ".jpg";
  File file = SD_MMC.open(path.c_str(), FILE_WRITE);
  if (!file) {
    Serial.println("Failed to open file for writing");
  } else {
    file.write(fb->buf, fb->len);
    Serial.printf("Saved: %s (%zu bytes)\n", path.c_str(), fb->len);
  }
  file.close();
  esp_camera_fb_return(fb);
}

// ===== Face Detection Setup =====
void setupFaceRecognition() {
  sensor_t * s = esp_camera_sensor_get();
  s->set_framesize(s, FRAMESIZE_QVGA); // Face recognition requires smaller frame
}

#include "camera_index.h"  // Web UI HTML
#include "camera_httpd.h"  // Built-in streaming + face detection handlers

void startCameraServer() {
  httpd_config_t config = HTTPD_DEFAULT_CONFIG();
  httpd_handle_t stream_httpd = NULL;

  httpd_uri_t index_uri = {
    .uri       = "/",
    .method    = HTTP_GET,
    .handler   = index_handler,
    .user_ctx  = NULL
  };

  httpd_uri_t stream_uri = {
    .uri       = "/stream",
    .method    = HTTP_GET,
    .handler   = stream_handler,
    .user_ctx  = NULL
  };

  // Start server
  if (httpd_start(&stream_httpd, &config) == ESP_OK) {
    httpd_register_uri_handler(stream_httpd, &index_uri);
    httpd_register_uri_handler(stream_httpd, &stream_uri);
    register_httpd_handlers(stream_httpd);
  }
}
👀 Web Interface Features
Once deployed, open http://<ESP32_IP>:
- 📺 Live MJPEG video stream
- 😊 Face detection toggle
- 😎 Face recognition with enrollment
- 📸 Manual capture
- 📂 Control camera settings (brightness, quality, etc.)
🔋 1. Optimize ESP32-CAM for Battery with Deep Sleep
🔄 Behavior Plan:
- ESP32-CAM sleeps most of the time to save power.
- It wakes on:
- 🚶 PIR motion detection (via GPIO interrupt)
- 🔘 Doorbell button press (via GPIO interrupt)
- On wake:
- Initializes camera + Wi-Fi
- Captures + saves image
- Optionally streams for 30s
- Then goes back to sleep
⚙️ Key Setup for Deep Sleep:
esp_sleep_enable_ext0_wakeup(GPIO_NUM_13, 1); // PIR (HIGH triggers wake)
esp_sleep_enable_ext1_wakeup((1ULL << GPIO_NUM_12), ESP_EXT1_WAKEUP_ANY_HIGH); // Doorbell
Here’s a complete and optimized ESP32-CAM Arduino sketch with deep sleep, triggered by:
- 🚶 PIR motion sensor (GPIO 13)
- 🔘 Doorbell button (GPIO 12)
🔋 Deep Sleep Flow:
- ESP32-CAM boots (after PIR/button trigger)
- Connects to Wi-Fi
- Takes a photo and saves to SD
- (Optional) Upload/send notification
- Returns to deep sleep
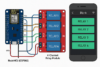
✅ Hardware Wiring
| Component | Pin | Notes |
|---|---|---|
| PIR OUT | GPIO 13 | Pull-down or stable output |
| Button | GPIO 12 | Pulled to GND on press |
| SD Card (built-in) | SD_MMC | No extra wiring needed |
| Flash LED | GPIO 4 | Optional |
🛠 Arduino Sketch (Deep Sleep Enabled)
#include "esp_camera.h"
#include "FS.h"
#include "SD_MMC.h"
#include <WiFi.h>
#include "esp_sleep.h"

// WiFi credentials (optional)
const char* ssid = "YOUR_WIFI_SSID";
const char* password = "YOUR_WIFI_PASSWORD";

// Pins
#define PIR_PIN GPIO_NUM_13
#define BUTTON_PIN GPIO_NUM_12

// Camera module (AI Thinker)
#define PWDN_GPIO_NUM     -1
#define RESET_GPIO_NUM    -1
#define XCLK_GPIO_NUM      0
#define SIOD_GPIO_NUM     26
#define SIOC_GPIO_NUM     27
#define Y9_GPIO_NUM       35
#define Y8_GPIO_NUM       34
#define Y7_GPIO_NUM       39
#define Y6_GPIO_NUM       36
#define Y5_GPIO_NUM       21
#define Y4_GPIO_NUM       19
#define Y3_GPIO_NUM       18
#define Y2_GPIO_NUM        5
#define VSYNC_GPIO_NUM    25
#define HREF_GPIO_NUM     23
#define PCLK_GPIO_NUM     22
#define LED_FLASH         4

void setup() {
  WRITE_PERI_REG(RTC_CNTL_BROWN_OUT_REG, 0); // Disable brownout detector
  Serial.begin(115200);
  delay(1000);

  // Reason for wakeup
  esp_sleep_wakeup_cause_t wakeup_reason = esp_sleep_get_wakeup_cause();
  Serial.print("Wakeup cause: "); Serial.println((int)wakeup_reason);

  // Init camera
  camera_config_t config;
  config.ledc_channel = LEDC_CHANNEL_0;
  config.ledc_timer = LEDC_TIMER_0;
  config.pin_d0 = Y2_GPIO_NUM;
  config.pin_d1 = Y3_GPIO_NUM;
  config.pin_d2 = Y4_GPIO_NUM;
  config.pin_d3 = Y5_GPIO_NUM;
  config.pin_d4 = Y6_GPIO_NUM;
  config.pin_d5 = Y7_GPIO_NUM;
  config.pin_d6 = Y8_GPIO_NUM;
  config.pin_d7 = Y9_GPIO_NUM;
  config.pin_xclk = XCLK_GPIO_NUM;
  config.pin_pclk = PCLK_GPIO_NUM;
  config.pin_vsync = VSYNC_GPIO_NUM;
  config.pin_href = HREF_GPIO_NUM;
  config.pin_sscb_sda = SIOD_GPIO_NUM;
  config.pin_sscb_scl = SIOC_GPIO_NUM;
  config.pin_pwdn = PWDN_GPIO_NUM;
  config.pin_reset = RESET_GPIO_NUM;
  config.xclk_freq_hz = 20000000;
  config.pixel_format = PIXFORMAT_JPEG;
  config.frame_size = FRAMESIZE_VGA;
  config.jpeg_quality = 10;
  config.fb_count = 2;

  if (esp_camera_init(&config) != ESP_OK) {
    Serial.println("Camera init failed");
    goToSleep();
  }

  // SD Card
  if (!SD_MMC.begin()) {
    Serial.println("SD Card Mount Failed");
    goToSleep();
  }

  // Optional Wi-Fi connection
  WiFi.begin(ssid, password);
  unsigned long start = millis();
  while (WiFi.status() != WL_CONNECTED && millis() - start < 5000) {
    delay(200);
    Serial.print(".");
  }
  Serial.println(WiFi.status() == WL_CONNECTED ? "WiFi Connected" : "WiFi Failed");

  takePhotoAndSave();

  delay(1000); // Ensure write completes
  goToSleep();
}

void takePhotoAndSave() {
  digitalWrite(LED_FLASH, HIGH); // Optional flash
  delay(100);

  camera_fb_t * fb = esp_camera_fb_get();
  digitalWrite(LED_FLASH, LOW);

  if (!fb) {
    Serial.println("Camera capture failed");
    return;
  }

  String path = "/photo_" + String(millis()) + ".jpg";
  File file = SD_MMC.open(path.c_str(), FILE_WRITE);
  if (!file) {
    Serial.println("Failed to open file");
  } else {
    file.write(fb->buf, fb->len);
    Serial.printf("Photo saved: %s (%zu bytes)\n", path.c_str(), fb->len);
    file.close();
  }

  esp_camera_fb_return(fb);
}

void goToSleep() {
  pinMode(PIR_PIN, INPUT_PULLUP);
  pinMode(BUTTON_PIN, INPUT_PULLUP);

  // Configure wake sources
  esp_sleep_enable_ext0_wakeup(PIR_PIN, 1); // Wake on PIR HIGH
  esp_sleep_enable_ext1_wakeup((1ULL << BUTTON_PIN), ESP_EXT1_WAKEUP_ANY_HIGH);

  Serial.println("Going to sleep...");
  delay(100);
  esp_deep_sleep_start();
}

void loop() {
  // Not used; device sleeps after setup
}
🧪 Notes
- Deep sleep saves 95%+ of power.
- PIR and button use GPIO interrupt wakeups.
- Keeps running only long enough to:
- Capture a photo
- Save to SD
- Optional upload/send alert
✅ Conclusion
This ESP32-CAM-based Wi-Fi doorbell camera project offers a practical, low-cost, and power-efficient solution for smart home security. With motion detection, doorbell-triggered image capture, local SD card storage, and deep sleep for extended battery life, it combines essential surveillance features into a compact, DIY-friendly system.
Its modular design allows future upgrades like cloud uploads, audio support, and live streaming—making it ideal for hobbyists, homeowners, or anyone seeking a customizable smart doorbell without monthly fees or proprietary hardware.


