
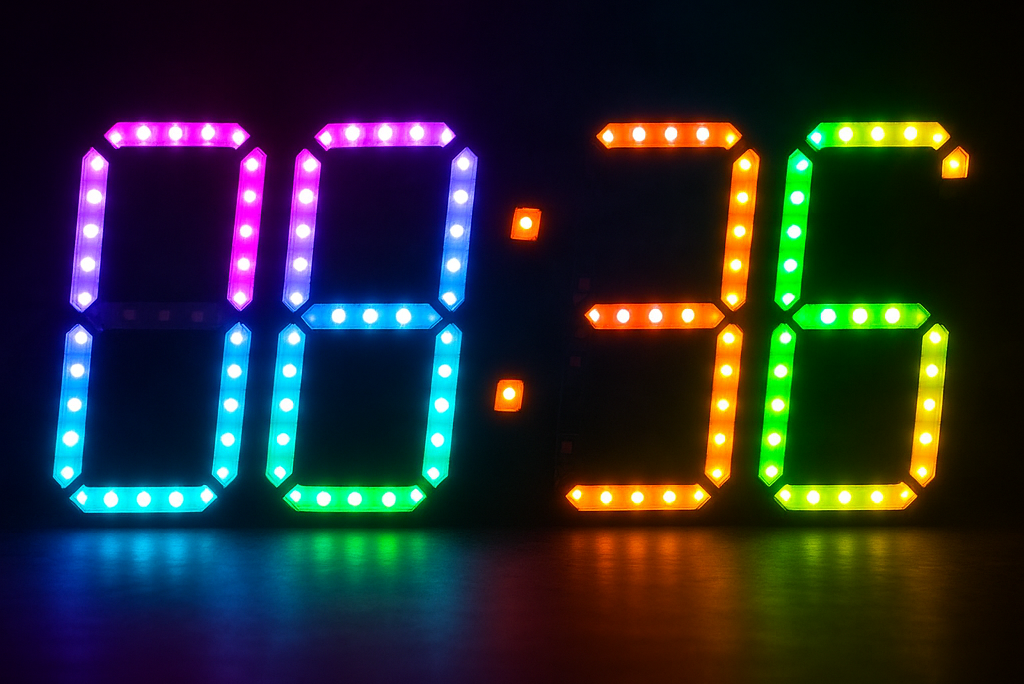
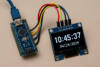
In this tutorial we are going to build an ESP32-based WS2812 LED clock that gets the time from an NTP server via Wi-Fi using the Arduino framework. This will show the current hour, minute, and second using a WS2812 LED strip.
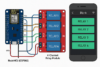
🔧 Hardware Needed:
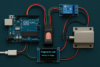
- ESP32 board (e.g., DevKit v1)
- WS2812B LED strip (at least 60 LEDs)
- Power supply for the LEDs
- Appropriate resistors/capacitors (e.g., 330 ohm on data line, 1000 µF cap across power)
📦 Libraries Required:
WiFi.h(built-in)time.h(built-in)Adafruit_NeoPixel.h(orFastLED)
✅ Install NeoPixel Library:
Go to Arduino IDE → Library Manager → Install Adafruit NeoPixel
🛠 Tips for Customization:
- Change
NUM_LEDSdepending on your strip length. - Add dimming or color fading for aesthetic.
- Add a button for changing brightness or colors.
- Use
FastLEDfor more advanced effects if needed.
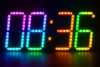
To build a digital 4-digit 7-segment clock using WS2812 LEDs and an ESP32, where each segment uses 3 LEDs, here’s a complete guide and code.
🧠 Concept Overview
- 4 digits (HH:MM format) → total 4 × 7 segments = 28 segments
- Each segment uses 3 LEDs, so:
28 × 3 = 84 LEDs - Optional colon between HH and MM can use 2 more LEDs
- Total: 86 LEDs for full clock (can adjust if you skip colon)
🧱 Segment Layout per Digit
Each digit is built from 7 segments labeled:
 --A--
|     |
F     B
|     |
 --G--
|     |
E     C
|     |
 --D--
We’ll define which LEDs correspond to which segments for each digit.
✅ Arduino Code Using Adafruit_NeoPixel
#include <WiFi.h>
#include <Adafruit_NeoPixel.h>
#include "time.h"

// Wi-Fi Setup
const char* ssid     = "YOUR_SSID";
const char* password = "YOUR_PASSWORD";

// LED Setup
#define LED_PIN     5
#define NUM_LEDS    86
Adafruit_NeoPixel strip(NUM_LEDS, LED_PIN, NEO_GRB + NEO_KHZ800);

// NTP Setup
const char* ntpServer = "pool.ntp.org";
const long  gmtOffset_sec = 0;
const int   daylightOffset_sec = 0;

// Segment to LED mapping (each segment = 3 LEDs)
const int digits[4][7] = {
  {  0,  3,  6,  9, 12, 15, 18},  // Digit 1 (H1)
  { 21, 24, 27, 30, 33, 36, 39},  // Digit 2 (H2)
  { 45, 48, 51, 54, 57, 60, 63},  // Digit 3 (M1)
  { 66, 69, 72, 75, 78, 81, 84},  // Digit 4 (M2)
};

const int colonLEDs[2] = {42, 43};  // Optional colon LEDs

// 7-Segment Digit Encoding (A to G)
const byte digitSegments[10][7] = {
  {1,1,1,1,1,1,0}, // 0
  {0,1,1,0,0,0,0}, // 1
  {1,1,0,1,1,0,1}, // 2
  {1,1,1,1,0,0,1}, // 3
  {0,1,1,0,0,1,1}, // 4
  {1,0,1,1,0,1,1}, // 5
  {1,0,1,1,1,1,1}, // 6
  {1,1,1,0,0,0,0}, // 7
  {1,1,1,1,1,1,1}, // 8
  {1,1,1,1,0,1,1}, // 9
};

// Colors
uint32_t onColor = strip.Color(0, 255, 0);
uint32_t offColor = strip.Color(0, 0, 0);

void setup() {
  Serial.begin(115200);
  strip.begin();
  strip.show();

  WiFi.begin(ssid, password);
  Serial.print("Connecting");
  while (WiFi.status() != WL_CONNECTED) {
    delay(500); Serial.print(".");
  }
  Serial.println("\nWiFi connected");

  configTime(gmtOffset_sec, daylightOffset_sec, ntpServer);
  struct tm timeinfo;
  while (!getLocalTime(&timeinfo)) {
    delay(500); Serial.print(".");
  }
  Serial.println("Time synchronized");
}

void loop() {
  struct tm timeinfo;
  if (getLocalTime(&timeinfo)) {
    int hour = timeinfo.tm_hour;
    int minute = timeinfo.tm_min;

    int digitsToShow[4] = {
      hour / 10,
      hour % 10,
      minute / 10,
      minute % 10
    };

    // Clear all LEDs
    strip.clear();

    // Light up digits
    for (int d = 0; d < 4; d++) {
      for (int s = 0; s < 7; s++) {
        bool on = digitSegments[digitsToShow[d]][s];
        int baseIndex = digits[d][s];
        for (int i = 0; i < 3; i++) {
          strip.setPixelColor(baseIndex + i, on ? onColor : offColor);
        }
      }
    }

    // Optional: Blink colon every second
    bool showColon = (timeinfo.tm_sec % 2 == 0);
    for (int i = 0; i < 2; i++) {
      strip.setPixelColor(colonLEDs[i], showColon ? onColor : offColor);
    }

    strip.show();
  }

  delay(1000);
}
🧰 Notes
- LED indexing: Make sure your LED strip is physically laid out to match your digit segment indexing.
- Power supply: WS2812s can draw a lot of current (up to 60mA per LED at full brightness). For 86 LEDs, use a 5V 3–5A PSU.
- Brightness control: You can add
.setBrightness()if it’s too bright.
🧱 Next Steps
Would you like me to:
- Help you design a layout diagram for segment LED positioning?
- Convert this to
FastLED? - Add brightness adjustment or animations?
🧩 1. Segment LED Layout Plan
Each digit has 7 segments, and each segment contains 3 WS2812 LEDs.
Here’s how a single digit layout looks, with segments labeled and LED order shown:
 A (0,1,2)
 ┌─────────────┐
 │             │
F(15,16,17)    B(3,4,5)
 │             │
 │     G(6,7,8)│
E(12,13,14)    C(6,7,8)
 │             │
 └─────────────┘
   D (9,10,11)
Note: The numbers above (e.g., A: 0,1,2) assume sequential LED placement per segment.
Now multiply this layout 4 times, once for each digit (HH:MM), and insert 2 LEDs for the colon (:) in the middle.
🎯 2. Total Layout & LED Index Plan
Let’s number the LEDs like this:
- Digit 1 (H1): Segments A–G = LEDs 0 to 20
- Digit 2 (H2): LEDs 21 to 41
- Colon (:): LEDs 42–43
- Digit 3 (M1): LEDs 45 to 65
- Digit 4 (M2): LEDs 66 to 86
You can place these physically in a rectangle like this:
[Digit1] [Digit2] : [Digit3] [Digit4]Digit1 Segment A = LED 0,1,2
Digit1 Segment B = LED 3,4,5
...
Digit4 Segment G = LED 84,85,86🛠️ 3. Physical Build Suggestions
- 3D print or laser-cut a 4-digit 7-segment clock frame
- Mount WS2812 LED strip cut into 3-LED pieces for each segment
- Wire each segment in the right order to ensure data flows sequentially from LED 0 to LED 86
- Use a capacitor (1000 µF, 6.3V+) across 5V and GND
- Use a 330 Ω resistor on the data line to prevent signal reflection
- Use a logic level shifter (optional, recommended if using 3.3V ESP32 and 5V WS2812)
🌟 Optional Features You Can Add
Would you like help with:
- Brightness control (auto dim at night?)
- Button input (to change time manually)
- Web interface (to set timezone or brightness)
- Fade/animation effects for digits
- RTC backup (in case Wi-Fi is down)
Let’s add a fade animation effect with rainbow colors per digit using WS2812 LEDs and the Adafruit_NeoPixel library.
🎨 Animation Behavior
- Each digit cycles through a rainbow gradient.
- Segments fade in and out as digits change.
- We’ll use
Wheel()to get smooth rainbow hues. - A short fade animation runs when a segment turns on/off.
🧠 Key Additions:
Wheel(byte pos)– converts 0–255 to rainbow color.fadeSegment()– gradually fades a segment in/out.- Track previous digits to animate only changed segments.
✅ Updated Code (with animation & rainbow)
#include <WiFi.h>
#include <Adafruit_NeoPixel.h>
#include "time.h"

const char* ssid = "YOUR_SSID";
const char* password = "YOUR_PASSWORD";

#define LED_PIN 5
#define NUM_LEDS 86
Adafruit_NeoPixel strip(NUM_LEDS, LED_PIN, NEO_GRB + NEO_KHZ800);

const char* ntpServer = "pool.ntp.org";
const long  gmtOffset_sec = 0;
const int   daylightOffset_sec = 0;

const int digits[4][7] = {
  {0, 3, 6, 9, 12, 15, 18},    // Digit 1
  {21, 24, 27, 30, 33, 36, 39},// Digit 2
  {45, 48, 51, 54, 57, 60, 63},// Digit 3
  {66, 69, 72, 75, 78, 81, 84} // Digit 4
};

const int colonLEDs[2] = {42, 43};

const byte digitSegments[10][7] = {
  {1,1,1,1,1,1,0},
  {0,1,1,0,0,0,0},
  {1,1,0,1,1,0,1},
  {1,1,1,1,0,0,1},
  {0,1,1,0,0,1,1},
  {1,0,1,1,0,1,1},
  {1,0,1,1,1,1,1},
  {1,1,1,0,0,0,0},
  {1,1,1,1,1,1,1},
  {1,1,1,1,0,1,1}
};

int lastDigits[4] = {-1, -1, -1, -1}; // To track changes

// Generate rainbow color from position 0-255
uint32_t Wheel(byte pos) {
  pos = 255 - pos;
  if (pos < 85) return strip.Color(255 - pos * 3, 0, pos * 3);
  if (pos < 170) { pos -= 85; return strip.Color(0, pos * 3, 255 - pos * 3); }
  pos -= 170; return strip.Color(pos * 3, 255 - pos * 3, 0);
}

// Fade a segment to a target color
void fadeSegment(int startIndex, uint32_t targetColor, int steps = 10, int delayMs = 15) {
  for (int s = 0; s < steps; s++) {
    float ratio = (float)s / (steps - 1);
    uint8_t r = (uint8_t)(ratio * ((targetColor >> 16) & 0xFF));
    uint8_t g = (uint8_t)(ratio * ((targetColor >> 8) & 0xFF));
    uint8_t b = (uint8_t)(ratio * (targetColor & 0xFF));
    uint32_t color = strip.Color(r, g, b);
    for (int i = 0; i < 3; i++) {
      strip.setPixelColor(startIndex + i, color);
    }
    strip.show();
    delay(delayMs);
  }
}

// Draw a single digit with fade if it changes
void drawDigit(int digitIndex, int number, int hueBase) {
  for (int seg = 0; seg < 7; seg++) {
    int baseLED = digits[digitIndex][seg];
    bool shouldBeOn = digitSegments[number][seg];
    bool wasOn = lastDigits[digitIndex] >= 0 ? digitSegments[lastDigits[digitIndex]][seg] : false;

    if (shouldBeOn && !wasOn) {
      fadeSegment(baseLED, Wheel(hueBase + seg * 10));
    } else if (!shouldBeOn && wasOn) {
      fadeSegment(baseLED, strip.Color(0, 0, 0));
    } else if (shouldBeOn) {
      uint32_t color = Wheel(hueBase + seg * 10);
      for (int i = 0; i < 3; i++) strip.setPixelColor(baseLED + i, color);
    } else {
      for (int i = 0; i < 3; i++) strip.setPixelColor(baseLED + i, 0);
    }
  }
}

void setup() {
  Serial.begin(115200);
  strip.begin();
  strip.clear();
  strip.show();

  WiFi.begin(ssid, password);
  Serial.print("Connecting");
  while (WiFi.status() != WL_CONNECTED) { delay(500); Serial.print("."); }
  Serial.println("\nWiFi connected");

  configTime(gmtOffset_sec, daylightOffset_sec, ntpServer);
  while (!getLocalTime(nullptr)) { Serial.print("."); delay(500); }
  Serial.println("Time sync complete");
}

void loop() {
  struct tm timeinfo;
  if (getLocalTime(&timeinfo)) {
    int currentDigits[4] = {
      timeinfo.tm_hour / 10,
      timeinfo.tm_hour % 10,
      timeinfo.tm_min / 10,
      timeinfo.tm_min % 10
    };

    for (int i = 0; i < 4; i++) {
      drawDigit(i, currentDigits[i], i * 64); // hueBase: 0, 64, 128, 192
    }

    // Blink colon
    bool showColon = (timeinfo.tm_sec % 2 == 0);
    uint32_t colonColor = showColon ? Wheel(128) : strip.Color(0, 0, 0);
    for (int i = 0; i < 2; i++) strip.setPixelColor(colonLEDs[i], colonColor);

    strip.show();

    // Save last digits
    for (int i = 0; i < 4; i++) lastDigits[i] = currentDigits[i];
  }

  delay(1000);
}
🌈 What This Adds
- Smooth fade-in and fade-out for segments that change.
- Each digit has a different rainbow hue range for aesthetics.
- Colon blinks every second in the middle (optional but pretty).
🧱 What You Can Add Next?
- Auto brightness by time of day?
- Fancy transition (slide, wave, etc.)?
- Add a web interface to choose theme?
🌐 Add Web Interface to Control:
- Color mode: Rainbow / Solid
- Solid color selector: Choose a static color
- Brightness control: Adjust brightness
- Toggle colon blinking
We’ll use:
- ESP32’s built-in WebServer
- HTML + JavaScript UI served from ESP32
- Handle settings with HTTP requests
- Store settings in global variables
✅ Now You Have:
- A web UI at ESP32’s IP
- Live control over:
- Rainbow or solid color
- Color picker
- Brightness
- Colon blink toggle
✅ Your complete ESP32 LED clock sketch with:
- ⏰ NTP time sync
- 🌈 Rainbow/solid digit color modes
- 🌐 Web interface for live control
- 🔢 4-digit 7-segment simulation using WS2812 (3 LEDs per segment)
- 🌟 Fade animations per segment
#include <WiFi.h>
#include <WebServer.h>
#include <Adafruit_NeoPixel.h>
#include "time.h"

// WiFi credentials
const char* ssid = "YOUR_SSID";
const char* password = "YOUR_PASSWORD";

// LED setup
#define LED_PIN 5
#define NUM_LEDS 86
Adafruit_NeoPixel strip(NUM_LEDS, LED_PIN, NEO_GRB + NEO_KHZ800);

// Time setup
const char* ntpServer = "pool.ntp.org";
const long gmtOffset_sec = 0;
const int daylightOffset_sec = 0;

// Web server
WebServer server(80);

// Segment mapping
const int digits[4][7] = {
  {0, 3, 6, 9, 12, 15, 18},    // Digit 1
  {21, 24, 27, 30, 33, 36, 39},// Digit 2
  {45, 48, 51, 54, 57, 60, 63},// Digit 3
  {66, 69, 72, 75, 78, 81, 84} // Digit 4
};
const int colonLEDs[2] = {42, 43};

// Digit segment patterns
const byte digitSegments[10][7] = {
  {1,1,1,1,1,1,0},
  {0,1,1,0,0,0,0},
  {1,1,0,1,1,0,1},
  {1,1,1,1,0,0,1},
  {0,1,1,0,0,1,1},
  {1,0,1,1,0,1,1},
  {1,0,1,1,1,1,1},
  {1,1,1,0,0,0,0},
  {1,1,1,1,1,1,1},
  {1,1,1,1,0,1,1}
};

// Settings
bool rainbowMode = true;
uint32_t solidColor = strip.Color(0, 255, 0);
uint8_t brightness = 100;
bool blinkColon = true;
int lastDigits[4] = {-1, -1, -1, -1};

// Web UI
const char* htmlPage = R"rawliteral(
<!DOCTYPE html><html><head><title>LED Clock Control</title></head><body>
<h2>LED Clock Control</h2>
<label><input type=\"checkbox\" id=\"rainbow\" onchange=\"update()\"> Rainbow Mode</label><br>
<input type=\"color\" id=\"color\" value=\"#00ff00\" onchange=\"update()\"><br>
<input type=\"range\" min=\"0\" max=\"255\" id=\"brightness\" value=\"100\" onchange=\"update()\"><br>
<label><input type=\"checkbox\" id=\"colon\" checked onchange=\"update()\"> Blink Colon</label><br>
<script>
function update() {
  fetch(`/set?rainbow=${rainbow.checked?1:0}&color=${color.value}&brightness=${brightness.value}&colon=${colon.checked?1:0}`);
}
</script></body></html>
)rawliteral";

uint32_t Wheel(byte pos) {
  pos = 255 - pos;
  if (pos < 85) return strip.Color(255 - pos * 3, 0, pos * 3);
  if (pos < 170) { pos -= 85; return strip.Color(0, pos * 3, 255 - pos * 3); }
  pos -= 170; return strip.Color(pos * 3, 255 - pos * 3, 0);
}

uint32_t getColor(int baseHue, int segment) {
  return rainbowMode ? Wheel((baseHue + segment * 10) % 256) : solidColor;
}

void fadeSegment(int startIndex, uint32_t targetColor, int steps = 10, int delayMs = 15) {
  unsigned long startTime = millis();
  for (int s = 0; s < steps; s++) {
    float ratio = (float)s / (steps - 1);
    uint8_t r = (uint8_t)(ratio * ((targetColor >> 16) & 0xFF));
    uint8_t g = (uint8_t)(ratio * ((targetColor >> 8) & 0xFF));
    uint8_t b = (uint8_t)(ratio * (targetColor & 0xFF));
    uint32_t color = strip.Color(r, g, b);
    for (int i = 0; i < 3; i++) strip.setPixelColor(startIndex + i, color);
    strip.show();
    while (millis() - startTime < (unsigned long)(s * delayMs)) yield();
  }
}

void drawDigit(int digitIndex, int number, int hueBase) {
  for (int seg = 0; seg < 7; seg++) {
    int baseLED = digits[digitIndex][seg];
    bool shouldBeOn = digitSegments[number][seg];
    bool wasOn = lastDigits[digitIndex] >= 0 ? digitSegments[lastDigits[digitIndex]][seg] : false;

    if (shouldBeOn && !wasOn) fadeSegment(baseLED, getColor(hueBase, seg));
    else if (!shouldBeOn && wasOn) fadeSegment(baseLED, strip.Color(0, 0, 0));
    else if (shouldBeOn) {
      uint32_t color = getColor(hueBase, seg);
      for (int i = 0; i < 3; i++) strip.setPixelColor(baseLED + i, color);
    } else {
      for (int i = 0; i < 3; i++) strip.setPixelColor(baseLED + i, 0);
    }
  }
}

void setup() {
  Serial.begin(115200);
  strip.begin();
  strip.clear();
  strip.show();

  WiFi.begin(ssid, password);
  while (WiFi.status() != WL_CONNECTED) { yield(); }
  Serial.println("\nWiFi connected");

  configTime(gmtOffset_sec, daylightOffset_sec, ntpServer);
  while (!getLocalTime(nullptr)) { yield(); }

  // Web setup
  server.on("/", []() { server.send(200, "text/html", htmlPage); });
  server.on("/set", []() {
    rainbowMode = server.arg("rainbow") == "1";
    blinkColon = server.arg("colon") == "1";
    brightness = server.arg("brightness").toInt();

    String hex = server.arg("color");
    if (hex.startsWith("#")) hex.remove(0, 1);
    long number = strtol(hex.c_str(), nullptr, 16);
    solidColor = strip.Color((number >> 16) & 0xFF, (number >> 8) & 0xFF, number & 0xFF);

    server.send(200, "text/plain", "OK");
  });
  server.begin();
  Serial.println("Web server started");
}

unsigned long lastUpdate = 0;
const unsigned long updateInterval = 1000;

void loop() {
  server.handleClient();
  unsigned long now = millis();
  if (now - lastUpdate >= updateInterval) {
    lastUpdate = now;
    struct tm timeinfo;
    if (getLocalTime(&timeinfo)) {
      int currentDigits[4] = {
        timeinfo.tm_hour / 10,
        timeinfo.tm_hour % 10,
        timeinfo.tm_min / 10,
        timeinfo.tm_min % 10
      };
      for (int i = 0; i < 4; i++) drawDigit(i, currentDigits[i], i * 64);

      strip.setBrightness(brightness);
      uint32_t colonColor = (blinkColon && timeinfo.tm_sec % 2 == 0) ? getColor(200, 0) : strip.Color(0, 0, 0);
      for (int i = 0; i < 2; i++) strip.setPixelColor(colonLEDs[i], colonColor);

      strip.show();
      for (int i = 0; i < 4; i++) lastDigits[i] = currentDigits[i];
    }
  }
}
✅ Conclusion and Working of ESP32 WS2812 LED Clock
📌 Overview
This ESP32 project creates a digital 4-digit 7-segment LED clock using WS2812 RGB LEDs. It fetches the current time from an NTP server over Wi-Fi, displays it using colorful 7-segment-style digits (each segment made of 3 LEDs), and provides a web-based control interface.
⚙️ Working Details
- Wi-Fi Connection:
- Connects to your specified Wi-Fi using SSID and password.
- Synchronizes time via the NTP server (
pool.ntp.org).
- LED Setup:
- 86 WS2812 LEDs:
- 4 digits × 7 segments × 3 LEDs = 84
- 2 LEDs for colon
- Adafruit NeoPixel library handles LED control.
- 86 WS2812 LEDs:
- Time Display:
- Time is fetched once every second using
millis()(non-blocking). - Digits update only if a change is detected.
- Colon blinks every second (configurable).
- Time is fetched once every second using
- Digit Rendering:
- Each digit uses 7 segments (with a 3-LED group per segment).
- Smooth fade animations are applied when turning segments on/off.
- Supports rainbow mode and solid color mode.
- Web Control UI:
- Web server hosted on the ESP32.
- Accessible via browser over local Wi-Fi.
- Controls:
- Toggle rainbow mode
- Set custom solid color
- Adjust brightness
- Toggle colon blinking
🧠 How to Use
- Replace
YOUR_SSIDandYOUR_PASSWORDin the code with your actual Wi-Fi credentials. - Upload the code to an ESP32 board using the Arduino IDE or PlatformIO.
- Open the Serial Monitor to get the ESP32’s IP address.
- Access the IP address in your browser to use the control interface.
- Enjoy your animated RGB digital clock!


