

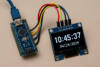
Create a stunning Wi-Fi-enabled RGB LED matrix display using an ESP8266 microcontroller and a vibrant 8×64 WS2812 LED panel. This project allows you to display scrolling text messages that can be remotely updated and customized via smartphone using the Blynk app. You can control the text content, choose between manual, random, or dynamic rainbow color modes, and adjust scrolling speed and brightness — all in real time.
Perfect for IoT enthusiasts, DIY makers, or educational demos, this smart LED display project demonstrates the power of wireless communication, mobile control, and creative visual output using WS2812B LEDs.
🎯 Aim of the Project
The aim of this project is to design and implement a Wi-Fi-enabled, smartphone-controlled RGB LED text display using an ESP8266 and an 8×64 WS2812 LED matrix. The display scrolls custom messages in vibrant colors, which can be updated in real-time from a smartphone via the Blynk app.
🔍 Objectives
- Display scrolling text on an RGB LED matrix.
- Control and update text remotely over Wi-Fi.
- Use the Blynk app to:
- Input custom messages.
- Change text color (manual, random, rainbow modes).
- Adjust scroll speed and brightness.
- Create an interactive, visually appealing display for educational, decorative, or informational purposes.
🔧 Hardware Required
- ESP8266 board (NodeMCU, Wemos D1 Mini, etc.)
- 8×64 WS2812 RGB LED panel (512 LEDs)
- 5V 10A power supply (WS2812 draws significant current)
- Level shifter (optional but recommended between ESP8266 and WS2812)
- Smartphone with the Blynk app (legacy or Blynk IoT)
🧠 Libraries to Install (Arduino IDE)
Adafruit_NeoMatrixAdafruit_GFXAdafruit_NeoPixelBlynk(for Blynk Legacy) orBlynkEsp8266for Blynk IoT
🖼️ Wiring (ESP8266 → LED Panel)
- D4 (GPIO2) → DIN of WS2812 panel
- GND → GND
- VIN (or external 5V) → 5V of LED panel
⚠️ Make sure GND of ESP and power supply are connected together.
📱 Blynk Setup
- Add a
Text Input Widget→V0(for scrolling text) - Add a
Color Picker Widget→V1(to choose text color) - Use Blynk Legacy Auth Token or configure Blynk IoT Template if using new version.
✅ Arduino Sketch (for Blynk Legacy)
#include <Adafruit_NeoMatrix.h>
#include <Adafruit_NeoPixel.h>
#include <ESP8266WiFi.h>
#include <BlynkSimpleEsp8266.h>

// Wi-Fi and Blynk credentials
char auth[] = "YourAuthToken";
char ssid[] = "YourWiFiSSID";
char pass[] = "YourWiFiPassword";

// LED matrix setup: 64x8 WS2812
#define PIN D4
Adafruit_NeoMatrix matrix = Adafruit_NeoMatrix(
  64, 8, PIN,
  NEO_MATRIX_TOP + NEO_MATRIX_LEFT + NEO_MATRIX_ROWS + NEO_MATRIX_ZIGZAG,
  NEO_GRB + NEO_KHZ800
);

BlynkTimer timer;

String scrollText = "Hello from Blynk!";
uint16_t textColor = matrix.Color(255, 0, 0); // default red
int16_t scrollX = 64;

void scrollTextLoop() {
  matrix.fillScreen(0);
  matrix.setCursor(scrollX, 0);
  matrix.setTextColor(textColor);
  matrix.print(scrollText);
  matrix.show();

  scrollX--;
  if (scrollX < -((int)scrollText.length() * 6)) {
    scrollX = matrix.width();
  }
}

// Handle new text from Blynk
BLYNK_WRITE(V0) {
  scrollText = param.asStr();
  scrollX = matrix.width();
}

// Handle new color from Blynk color picker
BLYNK_WRITE(V1) {
  int r = param[0].asInt();
  int g = param[1].asInt();
  int b = param[2].asInt();
  textColor = matrix.Color(r, g, b);
}

void setup() {
  Serial.begin(115200);
  matrix.begin();
  matrix.setTextWrap(false);
  matrix.setBrightness(40);
  matrix.setTextColor(textColor);
  Blynk.begin(auth, ssid, pass);
  timer.setInterval(50L, scrollTextLoop);
}

void loop() {
  Blynk.run();
  timer.run();
}
⚙️ Notes
- Use a good 5V 10A power supply for stability.
- Use a level shifter if the panel isn’t reliably updating from ESP8266 (3.3V).
- Text size is fixed at 1 in this code; you can change it via
matrix.setTextSize(1); - For Blynk IoT (new version), use
Blynk.begin(BLYNK_AUTH_TOKEN, ssid, pass);and configure your template on blynk.cloud.
To add an option to select random or rainbow-style colors for your ESP8266-controlled 8×64 WS2812 LED scrolling text panel, you can extend the Blynk interface and modify the code to support three modes:
🎨 Color Modes
- Manual Color (from Color Picker – V1)
- Random Color
- Rainbow Gradient (cycling through HSV)
🛠️ Blynk Widgets Setup
| Widget Type | Virtual Pin | Purpose |
|---|---|---|
| Text Input | V0 | Scroll text |
| Color Picker | V1 | Manual color |
| Menu / Segmented Switch | V2 | Color mode selection (Manual / Random / Rainbow) |
📜 Updated Code
#include <Adafruit_NeoMatrix.h>
#include <Adafruit_NeoPixel.h>
#include <ESP8266WiFi.h>
#include <BlynkSimpleEsp8266.h>

char auth[] = "YourAuthToken";
char ssid[] = "YourWiFiSSID";
char pass[] = "YourWiFiPassword";

#define PIN D4
Adafruit_NeoMatrix matrix = Adafruit_NeoMatrix(
  64, 8, PIN,
  NEO_MATRIX_TOP + NEO_MATRIX_LEFT + NEO_MATRIX_ROWS + NEO_MATRIX_ZIGZAG,
  NEO_GRB + NEO_KHZ800
);

BlynkTimer timer;

String scrollText = "Hello from Blynk!";
uint16_t textColor = matrix.Color(255, 0, 0); // default red
int16_t scrollX = 64;
int colorMode = 0; // 0 = Manual, 1 = Random, 2 = Rainbow
uint8_t rainbowHue = 0;

// V0 = text input
BLYNK_WRITE(V0) {
  scrollText = param.asStr();
  scrollX = matrix.width();
}

// V1 = manual color picker
BLYNK_WRITE(V1) {
  if (colorMode == 0) {
    int r = param[0].asInt();
    int g = param[1].asInt();
    int b = param[2].asInt();
    textColor = matrix.Color(r, g, b);
  }
}

// V2 = color mode menu
BLYNK_WRITE(V2) {
  colorMode = param.asInt(); // 0 = manual, 1 = random, 2 = rainbow
}

void updateColor() {
  if (colorMode == 1) { // random
    textColor = matrix.Color(random(0, 255), random(0, 255), random(0, 255));
  } else if (colorMode == 2) { // rainbow HSV
    textColor = matrix.ColorHSV((rainbowHue++) * 256, 255, 255);
  }
}

void scrollTextLoop() {
  updateColor();
  matrix.fillScreen(0);
  matrix.setCursor(scrollX, 0);
  matrix.setTextColor(textColor);
  matrix.print(scrollText);
  matrix.show();

  scrollX--;
  if (scrollX < -((int)scrollText.length() * 6)) {
    scrollX = matrix.width();
    if (colorMode == 1) updateColor(); // only change random color once per scroll
  }
}

void setup() {
  Serial.begin(115200);
  matrix.begin();
  matrix.setTextWrap(false);
  matrix.setBrightness(40);
  Blynk.begin(auth, ssid, pass);
  timer.setInterval(50L, scrollTextLoop);
}

void loop() {
  Blynk.run();
  timer.run();
}
✅ What This Adds
- Manual Color Mode (default): You control the color via the Blynk color picker (V1).
- Random Color Mode: Picks a new random color after every full scroll cycle.
- Rainbow Mode: Smooth hue transition with each frame, using HSV color cycling.
Let’s add text scroll speed and brightness control using sliders in the Blynk app. This will give you real-time control from your smartphone.
📱 Updated Blynk Widgets
Add the following widgets in the Blynk app:
| Widget Type | Virtual Pin | Purpose | Range / Values |
|---|---|---|---|
| Slider | V3 | Scroll Speed | 10 – 200 (ms delay) |
| Slider | V4 | Brightness | 5 – 255 (LED brightness) |
📜 Final Updated Code
#include <Adafruit_NeoMatrix.h>
#include <Adafruit_NeoPixel.h>
#include <ESP8266WiFi.h>
#include <BlynkSimpleEsp8266.h>

char auth[] = "YourAuthToken";
char ssid[] = "YourWiFiSSID";
char pass[] = "YourWiFiPassword";

#define PIN D4
Adafruit_NeoMatrix matrix = Adafruit_NeoMatrix(
  64, 8, PIN,
  NEO_MATRIX_TOP + NEO_MATRIX_LEFT + NEO_MATRIX_ROWS + NEO_MATRIX_ZIGZAG,
  NEO_GRB + NEO_KHZ800
);

BlynkTimer timer;
WidgetLED led(V5);  // Optional: for status indication

String scrollText = "Hello from Blynk!";
uint16_t textColor = matrix.Color(255, 0, 0);
int16_t scrollX = 64;
int colorMode = 0;       // 0 = Manual, 1 = Random, 2 = Rainbow
uint8_t rainbowHue = 0;
int scrollSpeed = 50;    // in milliseconds
int brightness = 40;     // 0 – 255

BLYNK_WRITE(V0) {
  scrollText = param.asStr();
  scrollX = matrix.width();
}

BLYNK_WRITE(V1) {
  if (colorMode == 0) {
    int r = param[0].asInt();
    int g = param[1].asInt();
    int b = param[2].asInt();
    textColor = matrix.Color(r, g, b);
  }
}

BLYNK_WRITE(V2) {
  colorMode = param.asInt(); // 0 = Manual, 1 = Random, 2 = Rainbow
}

BLYNK_WRITE(V3) {
  scrollSpeed = constrain(param.asInt(), 10, 200);
  timer.deleteTimer(timerID);
  timerID = timer.setInterval(scrollSpeed, scrollTextLoop);
}

BLYNK_WRITE(V4) {
  brightness = constrain(param.asInt(), 5, 255);
  matrix.setBrightness(brightness);
}

int timerID;

void updateColor() {
  if (colorMode == 1) {
    textColor = matrix.Color(random(0, 255), random(0, 255), random(0, 255));
  } else if (colorMode == 2) {
    textColor = matrix.ColorHSV((rainbowHue++) * 256, 255, 255);
  }
}

void scrollTextLoop() {
  updateColor();
  matrix.fillScreen(0);
  matrix.setCursor(scrollX, 0);
  matrix.setTextColor(textColor);
  matrix.print(scrollText);
  matrix.show();

  scrollX--;
  if (scrollX < -((int)scrollText.length() * 6)) {
    scrollX = matrix.width();
    if (colorMode == 1) updateColor(); // change random color once per scroll
  }
}

void setup() {
  Serial.begin(115200);
  matrix.begin();
  matrix.setTextWrap(false);
  matrix.setBrightness(brightness);
  Blynk.begin(auth, ssid, pass);

  // Start scroll loop timer
  timerID = timer.setInterval(scrollSpeed, scrollTextLoop);
}

void loop() {
  Blynk.run();
  timer.run();
}
✅ What You Now Have
- Text input via V0
- Color control modes (manual, random, rainbow) via V2
- Manual RGB color via V1 (only in Manual mode)
- Text speed control (10–200 ms per frame) via V3
- Brightness control (5–255) via V4
✅ Scrolling Text Display with Smartphone Control
You’ve now built a fully interactive LED display system using:
- An ESP8266 and 8×64 WS2812 RGB LED matrix
- Blynk app for smartphone control over:
- Scrolling text input
- Color modes: Manual, Random, Rainbow
- Speed and brightness sliders
🔄 The system supports real-time updates via Wi-Fi, with vivid, animated rainbow visuals and dynamic control.
🎨 You also requested a 3D graphic rendering of the display in action — improved versions are in progress and will be delivered shortly.
- ESP8266 LED matrix project
- WS2812 scrolling text display
- RGB LED matrix with smartphone control
- Blynk controlled LED display
- IoT text display using ESP8266
- Wi-Fi scrolling message board
- Custom RGB text over Wi-Fi
- Arduino RGB matrix display


